
Creating beautiful, mobile-optimized contact forms doesn’t require any advanced skills like coding and the likes. All you need to do is make a few clicks then place your lead capture material anywhere on your site thanks to the Intercom WordPress plugin.
In today’s post I will walk you through all the necessary steps needed to integrate your WordPress website with the Intercom plugin properly so that you can get the best out of it.
What Does the Intercom Plugin Allow you to do in WordPress?
The Intercom plugin allows you to;
Add Contact Forms to your Website
Almost every site has a contact form but not all sites have an email list. Why? You may ask.
Building an email list is much more than placing contact forms on your site. It is about what happens behind-the-scenes to make people want to fill in those contact forms.
Intercom has a relationship building infrastructure under it that enables you to properly place contact forms at designated places on your site to better increase their conversion rates. With the data you are given from this plugin you can strategically place sign up forms anywhere on your site in seconds.
This plugin also allows you to;
Connect Intercom to your WooCommerce Store
Ecommerce is getting tougher and tougher these days. If you don’t have tools that can help you keep up with the rapid transformation, you will fail.
Connecting your WooCommerce store to the Intercom plugin will increase your sales. For example; if someone abandons their cart, you can automatically send them an abandoned cart email sequence that will convince them to purchase that item or something else.
The plugin also allows you to;
Chat With Your Website Visitors
The Intercom plugin lets you add what is known as “Intercom Messenger,” which is a functionality that allows you to live chat with your site visitors.
We live in a fast-paced world where instant communication is vital, this functionality will help you help your visitors find what they are looking for fast.
How to Integrate Intercom and WordPress
Step-by-Step
Integrating Intercom and WordPress is quite simple if you can follow the steps I have laid down for you below:
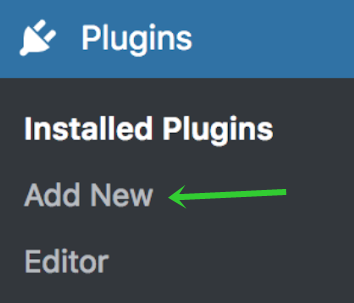
- Log in to WordPress with an “Administrator Account” and go to “Plugins > Add New.”
- Type “Intercom” in the search bar and select the option that says “Intercom by Intercom” and install it.
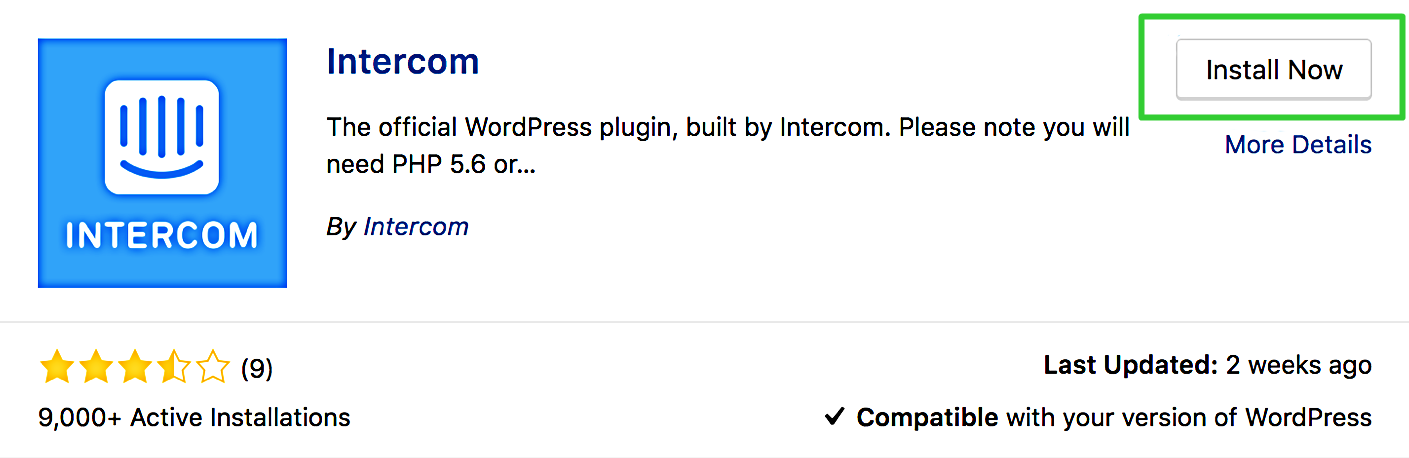
- Activate your plugin.
- Go to “Settings > Intercom” then click on “Connect with Intercom.”
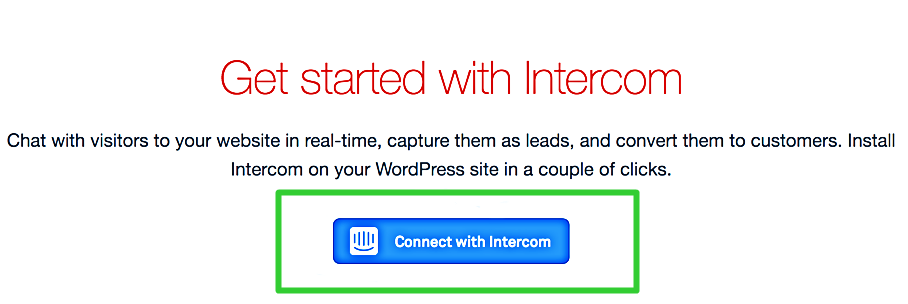
- Confirm your WordPress address as well as go through the authentication process then you are done.

How to Integrate Intercom and WooCommerce Step-by-Step
If you are looking to connect Intercom to your WooCommerce store you should consider following these few simple steps and you are good to go.
- Log in to WordPress with your “Administrator Account” and go to “WooCommerce > Settings.”
- Click on “Integration” then look for “Intercom.”
- Go to developers.intercom.com and click on “Apps.
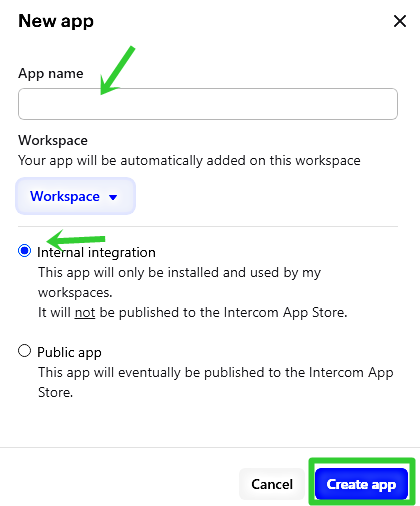
- Click “New app” and add the name of your app then select “Internal integration.”
Click the “Create app” button which will redirect you to a new tab.
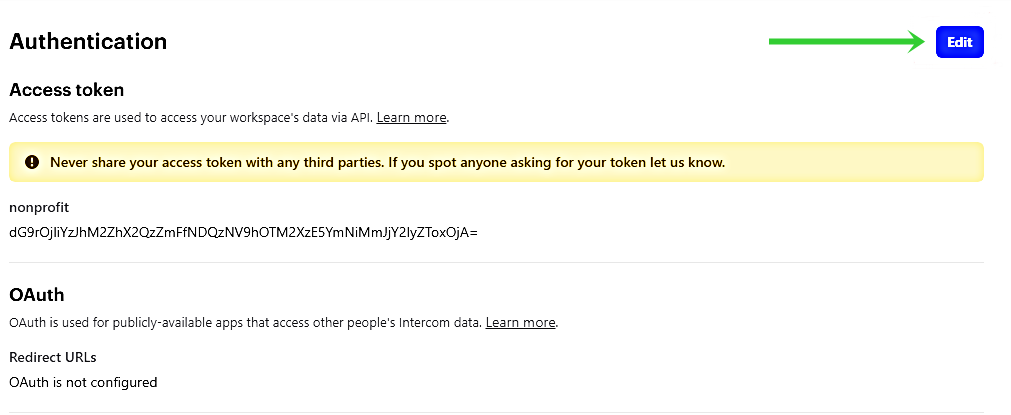
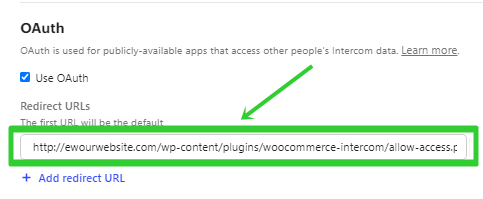
- Click on “Edit” on the top right corner and paste the “Redirect URL” which you will find from “WooCommerce > Settings > Integration.”
- Save changes then go to the “Basic Information” section.

- Copy and paste the “Client ID” and “Client secret” into the WooCommerce Intercom Integration tab and click “Allow Access” to round up your integration.

You can now chat with your web visitor in real time.
Become one of the 10% of eCommerce stores that make it to the 5 year survival mark with the help of Intercom.
Haven’t installed the plugin yet? Try it out now whilst it is still free.