Your email is done. The copy is so good, you are particularly excited about this one. You go over to check the essentials:
- Headline? Check!
- Design? Simple and effective.
- Contacts? All set.
And with a sense of satisfaction and joy, you hit “Send”.
But that joy doesn’t last for long. Because a few hours later, clients begin to call in. Apparently, they have not received that all-important email.
Soon you realize that a good volume of your list did not receive your mails in their inbox.
Your emails instead headed straight to the despised email dungeon => Spam.
Or worse still, turned out to be a “bounce” and hence never made it to their emails.
If this has ever been you then trust me, I know how it feels. The frustration. The anguish!
Which is why today I’ll be showing you how I was able to turn this around using Zapier. Using this technique will drastically improve your email deliverability rates. So that your emails land exactly where you want them to be => the Primary Inbox.
Let’s get started.
Why create such a workflow to monitor your email deliverability?
Recently I created a Zapier workflow to monitor that each email that we send was actually acted on. Either that it was correctly opened and therefore didn’t end up in spam. Or that we followed up with the client to see if he correctly received the email.
This is useful for businesses that heavily rely on one email being seen. Not so much applicable if you company sends 10 emails a week and only look at deliverability as a global metric to watch in a dashboard.
Setup: ESP + Zapier + Spreadsheet
What you’ll need to make this work:
- Zapier Account
- Your ESP connected to Zapier
- Google Sheet
- Pipedrive (or your favorite CRM SaaS)
- Bonus: Slack
Note: your ESP integration with Zapier needs to be able to pass two types of information: email send (or a custom event that can be applied directly after and email is sent) and email opening. By combining the two, you can monitor both inputs for this automation.
Each part broken down
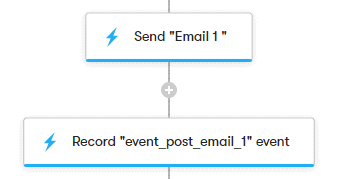
In your ESP
In Zapier
You will need 2 zaps to make this work. The first Zap will be focused on the email send event while the second one will be to monitor any opening of the email.
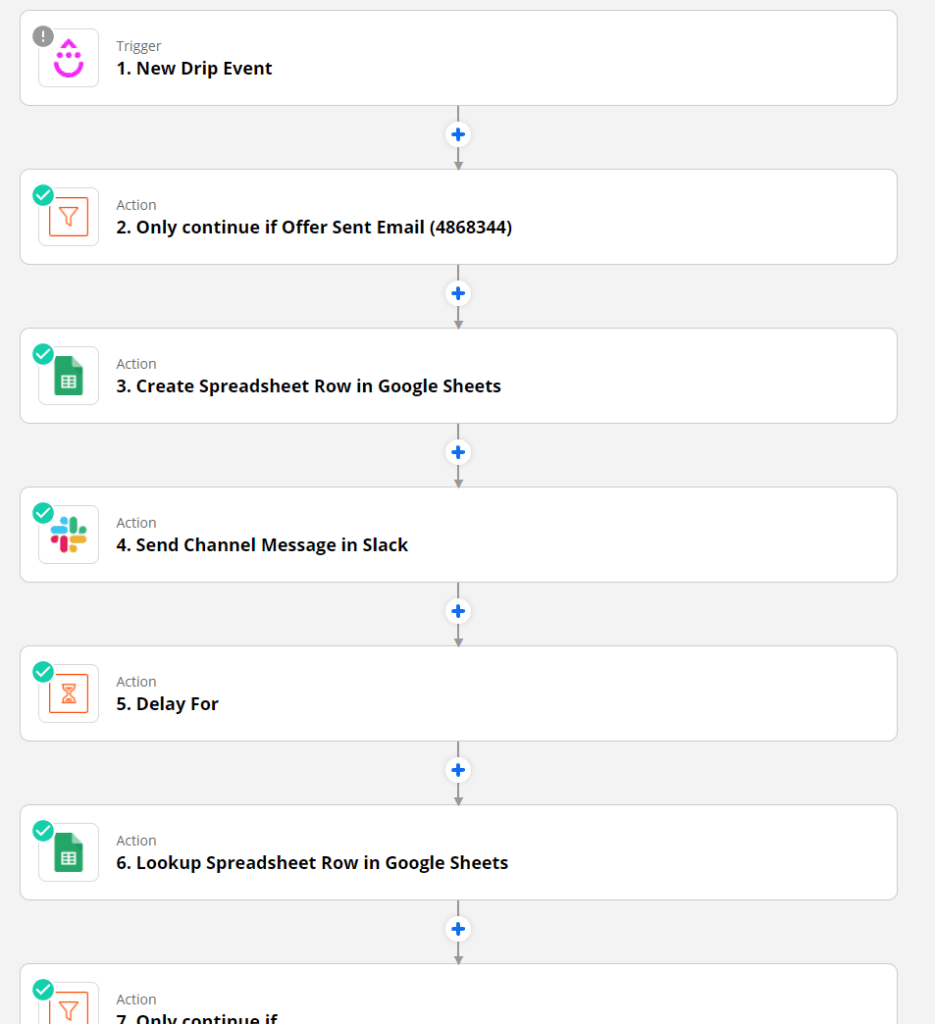
Zap One
The trigger is the email sent or in my case with Drip: a custom event explained above.
You can filter for a specific email based on email identifier, subject line or From address if you want to restrict this monitoring to one or a group of emails.
Third step is to create a new row in a spreadsheet with the fields listed below in the Spreadsheet section.
Bonus: you can add a Slack step to stay informed within Slack every time this automation is triggered. And when the email is opened or not.
Then you add a delay step, in my cases 2 days, this should give enough time to your customer to open the email.
Zap Two
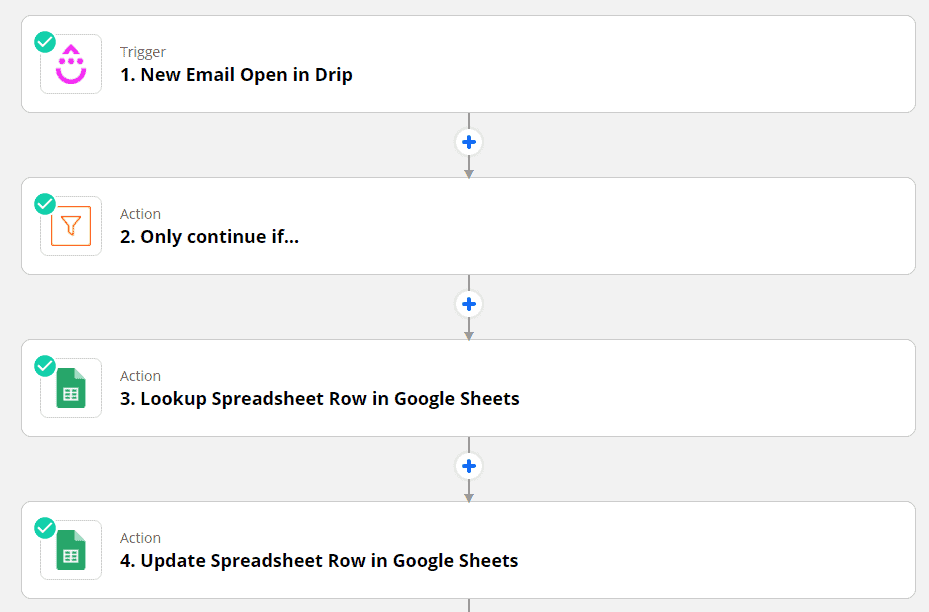
The trigger is the new email open.
Similar to Zap one, you can filter for a specific email
The spreadsheet
In order to connect the two Zaps, you need a central place to collect the send and open actions. This is what the sheet will help us do.
The first zap will add the email address, identifier of the email you want to track and the send timestamp.

The second zap will only add the information about an opening event (the first time the email was open, we don’t need more). To do this I simply added a Yes column that will be filled with a Yes.
In order to find the right email address associated to the opening event, you need an extra step to find the right row. Search for the email address in Column A.
The sheet is checked by the Zap one after the initial delay has passed, leading to a specific follow up activity if the email is not opened or to do nothing if the email was correctly seen.
Conclusion
By monitoring for a couple of weeks, you should be able to spot patterns on emails that are not being delivered properly. Then you can make a plan to improve this and impact your deliverability metrics significantly.
Have you built custom solution to monitor deliverability? Let me know in the comments.
