Introduction
A campaign is a marketing message that you propagate with ads, email, or some other medium. If you own a store online, you might be willing to send transactional emails to your clients concerning information about their account activity and purchases. Transactional emails are the ones that are sent to a single person at a time and can carry a limited type of content. You can send transactional emails to subscribers with the help of a few different means offered by MailChimp.
Email sent by a single sender to a single recipient, usually associated with commercial transactions or account activity. Examples encompass purchase confirmations, personalized notifications of products, and password reminder emails.
Transactional emails permit you to convey information that is uniquely associated with the recipient. These emails share requested information or remind a person of requisite activity; for instance, they put products in their shopping cart but later did not complete the process of purchasing.
Transactional and Bulk Emails
The transactional email typically uses SMTP or API integration to send emails. This process mostly requires a professional developer to set up a system to send coded template messages to specified recipients based on a particular action. You can convey these emails to various ‘Types of contacts’ in the list of your audience. For different organizations and companies, it is a requirement to use both transactional and bulk emails.
Things to Remember
Ensure the presence of the recipient in your subscriber audience by sending an email. If you do not have a targeted audience on your list, you can import the audience to your MailChimp account or invite people for the subscription via a signup form. It would be best if you were sure to verify the domain of your email before sending your first email.
Step by Step Process
Following are a few steps to take before you proceed to start this process:
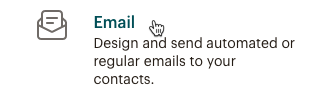
- Create an Email
To create an email, proceed with the steps depicted below:
Step 1: Click on Create

Step 2:
Step 3: Now, click on the Begin button.

This will ultimately lead you to the builder, from where you can select your settings and design the content.
- Setup and Design
The email builder is designed to let you work on various aspects of the email the way you want and review all the steps before sending. There are four main steps to take before sending the email.
- Add your recipients in the option.
- Add your requisite email address and name in the “From” section.
- In the Subject section, add your subject line.
- In the Content section, design your email.
A green-colored checkmark will show up next to the corresponding segment when all of these tasks are completed. You may also want to recheck the tracking options as well as other settings.
- Add Recipients
To choose your targeted audience and select your recipients, follow these steps:
- Click on Add Recipients
From the enlisted Audience drop-down menu, go and choose the audience you are willing to convey your message to.

Click Save and add from the email address and name.
Follow the steps described below to set up your “From” email address and “From” name:
- In the “From” portion of the email builder, proceed to click Add From.
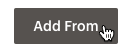
- Write down your “From” name and email address.
- You may be asked to verify the domain of your email address.

- Click Save
Conclusion
You can now customize the campaign where required and send it out to any specific person or any of your new subscribers. This way, MailChimp allows you to send personalized emails to your targeted audience. You can send a MailChimp campaign to one person and new subscribers if the email has already been sent to an older audience.